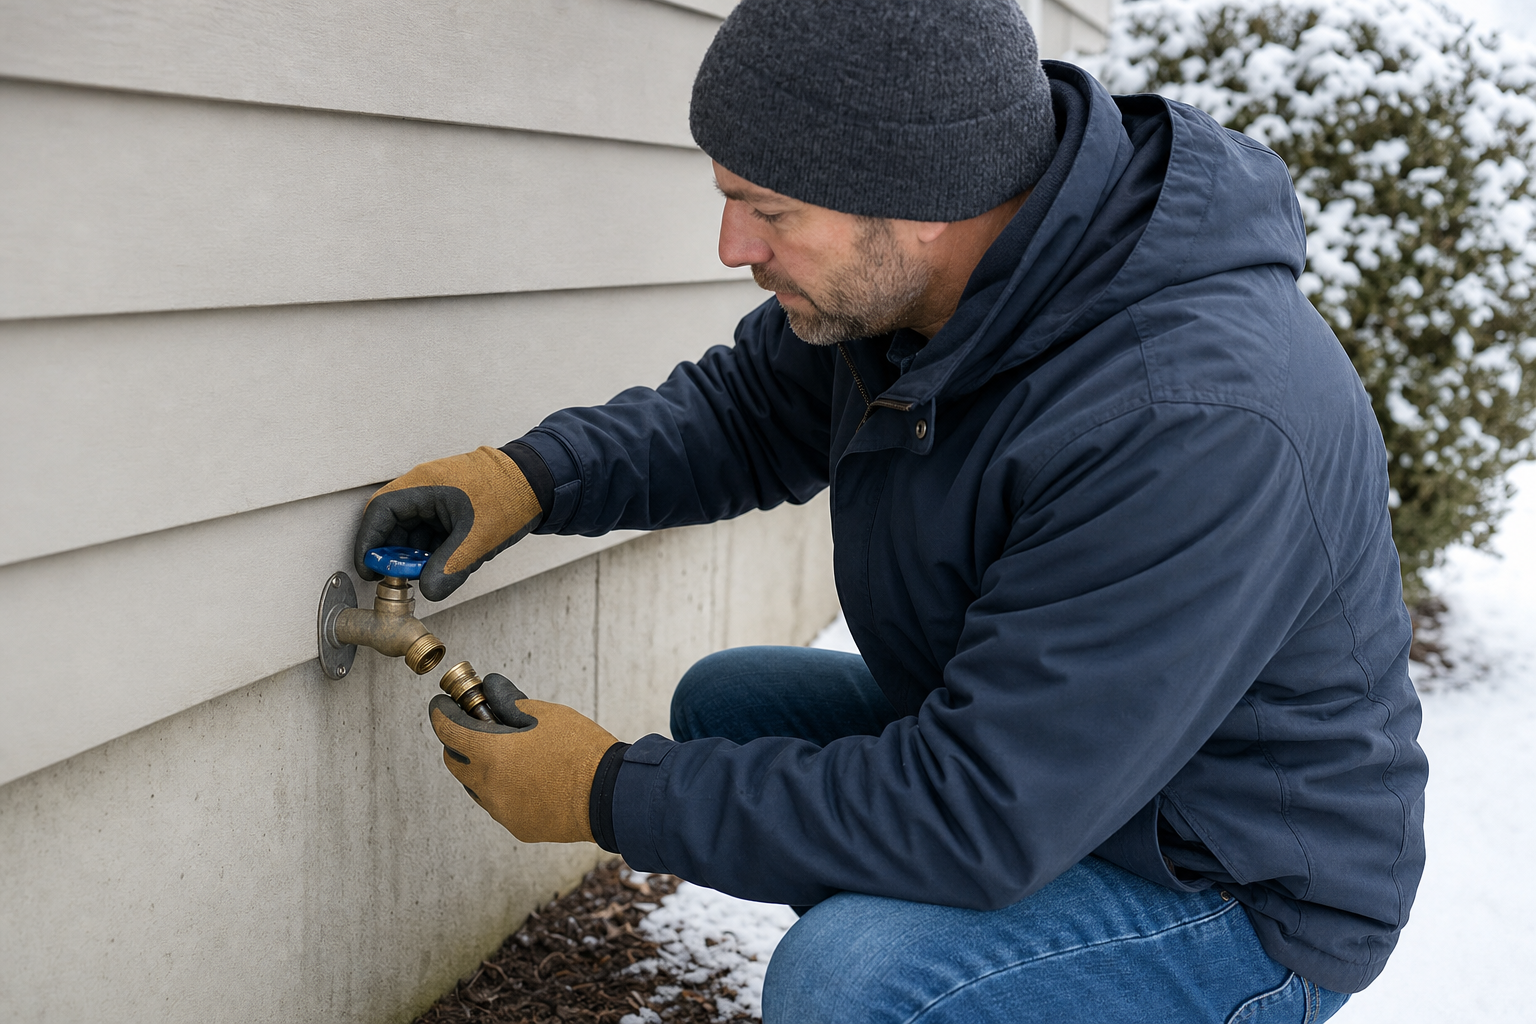
To winterize outdoor faucets, remove every hose and attachment first, then use the procedure that matches the faucet and plumbing arrangement. For a standard hose bib with a dedicated indoor shutoff, close the indoor valve, drain the outdoor line and leave the outside faucet open. A conventional frost-free sillcock normally remains connected to the water supply: close its outdoor handle and make sure nothing prevents it from draining. Complete the work before temperatures are forecast to reach 32°F (0°C) or below.
Do not apply one checklist to every outdoor connection. Check faucets at the house, garage, screened porch and other unheated areas individually.
Identify the type of outdoor faucet
A standard hose bib has its shutoff mechanism in the compact valve body outside the house. Closing the handle can leave water in the faucet and the pipe near the exterior wall. In a freezing climate, this type is best protected by a separate indoor shutoff that lets the branch be drained.
A frost-free sillcock, also called a frost-proof or freezeless faucet, has a long tube extending through the wall. On a conventional model, turning the exterior handle off closes the valve several inches inside the building, ideally in heated space. The outer tube then drains through the outlet.
Exterior clues can include a long stem, a wall flange and wording such as “frost-free” or “remove hose or faucet may freeze.” Some faucets also have a vacuum breaker at the top. A vacuum breaker or anti-siphon fitting alone, however, does not confirm that the faucet is frost-free.
When possible, check the model number or inspect the pipe from a basement, crawl space, garage or utility room. If you cannot identify the faucet, remove all attachments, fit an insulating cover and ask a licensed plumber to assess a vulnerable installation before severe weather arrives.
Winterize a standard hose bib with an indoor shutoff
- Remove everything from the outlet. Disconnect the hose, splitter, timer, nozzle, quick connector, pressure regulator and irrigation fittings. Drain hoses before storage so trapped water cannot freeze.
- Find the correct indoor shutoff. It may be in a basement, crawl space, garage, utility room or cabinet near the exterior wall. Do not confuse it with the home’s main water shutoff.
- Close the indoor valve. On a lever-style ball valve, the handle is generally closed when it is perpendicular to the pipe. Older round-handled valves usually close clockwise. Do not force a corroded or stuck valve.
- Open the exterior faucet fully. This drains the isolated branch. If the indoor valve has a drain or bleeder port on the outdoor side of the valve, place a container beneath it and operate it as directed by the valve manufacturer. Refit the cap gently afterward.
- Leave the outside faucet open. Once its supply has been isolated and drained, leaving the outdoor valve open allows residual water to escape and gives any small remaining amount room to expand.
After several minutes, check for continuing flow or a persistent drip. Either may mean that the indoor shutoff is not sealing. Arrange service rather than assuming the line is protected for winter.
Winterize a conventional frost-free sillcock
- Disconnect every attachment. Remove the hose, splitter, timer, nozzle and any fitting that could block the outlet. On many conventional frost-free faucets, an attached hose or closed-end device prevents the tube from draining and can allow it to freeze.
- Turn the exterior handle fully off. The valve should close at its protected point inside the wall. Water may drain briefly from the outlet as the tube empties.
- Check that drainage is possible. A properly installed conventional frost-free faucet needs a slight downward pitch toward the outlet. A faucet that slopes back toward the house may retain water.
- Leave the exterior handle closed. The water supply normally remains on, so an open faucet would run water rather than protect the fixture.
Not every frost-free product works in exactly the same way. Some specialist models are designed to drain with a hose attached, but homeowners should follow the instructions for their specific model. Unless the manufacturer says otherwise, remove attachments before freezing weather.
If a frost-free faucet does not appear to drain, slopes the wrong way or has frozen before, have a licensed plumber inspect it. Frost-free designs depend on correct installation as well as correct use.
When an indoor shutoff is used with a frost-free faucet
Some homes have an indoor shutoff for a frost-free faucet, and a plumbing design or manufacturer may call for seasonal isolation. In that case, remove attachments, close the indoor supply valve, open the exterior faucet and let the branch drain. With the supply isolated, leave the outside faucet open unless the faucet manufacturer or local plumber directs otherwise. Label the indoor valve so nobody turns it back on while the exterior faucet is open.
If the home’s arrangement is unclear, do not guess. Closing an indoor valve without draining the downstream section can still leave water exposed to freezing.
What to do when there is no dedicated shutoff
If a standard hose bib has no indoor isolation valve, remove all hoses and accessories, close the faucet normally and fit a snug insulated cover. Insulate accessible supply pipe in unheated areas, reduce cold-air leaks around pipe penetrations where appropriate and keep the building heated.
A foam or rigid faucet cover is supplemental protection, not an alternative to shutting off and draining a standard outdoor line. Its effectiveness depends on the home’s heat, wind exposure, insulation, pipe location and the duration of freezing weather. See whether outdoor faucet covers work in freezing weather for the limits of this approach.
Do not disassemble an outdoor faucet or attempt an improvised plumbing alteration shortly before a freeze. Ask a licensed plumber about adding an accessible indoor shutoff and drain valve or replacing an unsuitable faucet. For frost-free faucets, correct barrel length, a downward pitch and a supply connection within heated space are important installation details.
For a severe or prolonged freeze, follow guidance from your local water utility and know where the main water shutoff is located. Letting water run is generally a temporary measure for vulnerable indoor plumbing, not a substitute for winterizing an outside faucet; an outdoor outlet can also create an ice hazard. See when dripping faucets may be appropriate in freezing weather.
If the property will be vacant, keep the heat on. Consider professional winterization where plumbing runs through exterior walls, garages, crawl spaces or other unheated spaces.
Check for hidden freeze damage in spring
A frost-free faucet can split inside its tube during winter without showing an obvious leak while it is closed. The leak may become apparent only when the faucet is opened. Inspect it before attaching a hose or leaving water running unattended.
- Inspect the handle, outlet, wall flange and any visible pipe for cracks, looseness or staining.
- For a seasonally isolated line, close the exterior faucet first. Slowly reopen the indoor supply valve while watching accessible pipe and the wall area.
- Have one person watch inside near the pipe penetration while another briefly opens the outdoor faucet.
- Look and listen for dripping, spraying or water in a basement, crawl space, ceiling, wall cavity or around exterior siding.
- Close the faucet and check again after several minutes. Confirm that it stops flowing and does not leak around the stem or vacuum breaker.
If water appears inside the building, the flow is unexpectedly weak or the faucet will not shut off cleanly, close the indoor isolation valve or main supply if necessary. Do not use the faucet until a licensed plumber has inspected and repaired it.